
Block and Beam Floor Installation⁚ A Comprehensive Guide
This guide details the installation of block and beam floors, a popular, durable flooring solution in UK construction․ It covers site preparation, beam placement, block installation, addressing services, slipbrick placement, wet trades, insulation, concrete topping, underfloor heating (if applicable), building regulation compliance, and final inspection․
Site Preparation and Groundwork
Before commencing block and beam floor installation, meticulous site preparation is paramount․ Begin by thoroughly excavating the area to the required depth, ensuring a level base for optimal support․ Remove all organic matter, vegetation, and debris from the excavated area to prevent future settling or decomposition issues․ Compaction of the sub-base is crucial; use a suitable method like a vibrating plate compactor to achieve a stable, even foundation․ If dealing with heavy clay soil, consider increasing the void depth beneath the floor to at least 225mm, or more if necessary․ The removal of all organic material and the application of weed killer are standard best practices․ Proper site drainage should be established to prevent water accumulation under the floor․ This can involve installing drainage channels or adjusting the ground level to ensure proper runoff․ Remember to consider ventilation; air bricks or ventilation sleeves in external walls are necessary to avoid gas buildup․ If radon is a concern in your area, consult the relevant building regulations and guidelines for appropriate radon barriers and mitigation strategies․ The focus on these initial steps ensures a solid and stable base for the long-term durability of your block and beam floor․
Beam Placement and Support
Precise beam placement is critical for structural integrity․ Begin by carefully laying out the precast concrete beams according to the approved floor plan, ensuring accurate spacing and alignment․ The beams should rest firmly on the supporting walls or structures; check for levelness using a spirit level and make any necessary adjustments․ Prior to placement, clean the underside of each beam to remove any dirt or debris that might compromise the bearing surface and damage the damp-proof course (DPC)․ Support the beams adequately during placement to prevent damage or sagging․ Use temporary supports, such as timber props or adjustable stands, positioned strategically along the beam’s length․ The number and placement of these supports will depend on the beam length and the overall weight of the structure․ Once the beams are correctly positioned and supported, ensure they are securely fixed to the supporting walls․ This is typically achieved using appropriate fixings specified by the manufacturer․ Regularly check the alignment and levelness of the beams throughout the installation process to ensure they remain correctly positioned․ Remember, the stability of the entire floor system hinges on the accurate and secure placement of these beams․
Infill Block Installation and Spacing
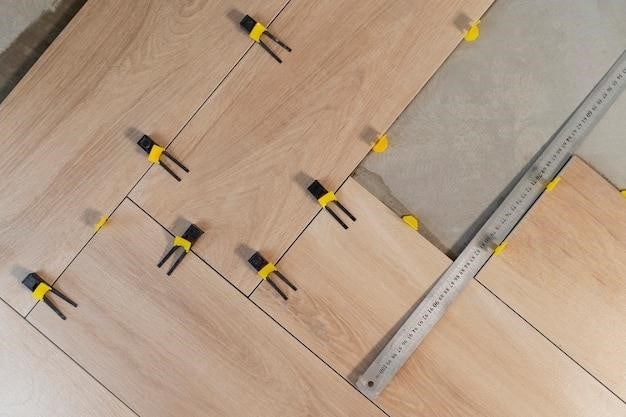
After the beams are securely in place, begin installing the infill blocks․ These blocks, typically lightweight concrete or EPS blocks, fill the spaces between the beams, creating a solid floor surface․ Start by placing infill blocks at either end of the beams to act as spacers, ensuring consistent spacing between the beams․ This is crucial for maintaining the structural integrity of the floor․ The remaining infill blocks can then be carefully dropped into place, ensuring a snug fit․ Use a rubber mallet to gently tap the blocks into position if needed, avoiding any forceful impacts that could damage the blocks or the beams․ For accurate spacing, regularly check the distances between the blocks and the beams using a measuring tape or level․ If any blocks need trimming to fit around protruding services or pipes, use a masonry saw to cut them precisely to the required dimensions․ Always wear appropriate safety gear, such as safety glasses and gloves, when cutting blocks․ Ensure that the blocks are level and aligned, creating a smooth and even surface․ Any gaps or inconsistencies in block placement can compromise the floor’s strength and stability․ Before proceeding to the next stage, carefully inspect the installed infill blocks to ensure they are properly positioned and secure․
Addressing Protruding Services and Pipes
Before commencing infill block installation, carefully identify and mark the locations of all protruding services and pipes on the floor plan․ Accurate planning is vital to avoid damaging utilities during the construction process․ These services might include drainage pipes, electrical conduits, or heating pipes․ When positioning the beams, ensure sufficient clearance is maintained around each service to allow for easy access and prevent damage․ If beams need adjustment to accommodate services, make the necessary modifications before proceeding․ During infill block installation, carefully cut and shape the blocks to fit snugly around any protruding pipes or services․ Use a masonry saw for precise cuts, ensuring a clean and even finish․ Take extra care to avoid damaging the pipes or services during the cutting process․ Always wear appropriate safety gear, including safety glasses and gloves, while working with cutting tools․ Once the blocks are in place around the services, inspect the installation for any gaps or inconsistencies․ If necessary, use suitable filler material to seal any gaps and ensure a secure and watertight fit․ This prevents potential problems with dampness and pest infestation․ Properly addressing protruding services ensures the long-term integrity and performance of the block and beam floor system, preventing future issues and maintenance․
Slipbrick Placement and Wall Preparation
Precise slipbrick placement is crucial for the structural integrity of the block and beam floor․ Before installing slipbricks, carefully prepare the substructure walls․ Ensure the walls are plumb and level to provide a stable base for the slipbricks and prevent uneven settling of the floor․ Any irregularities on the wall surface should be addressed to ensure a solid bearing for the slipbricks․ Clean the wall surfaces thoroughly to remove any dust, debris, or loose mortar that could compromise the bond between the slipbricks and the wall․ The slipbricks should be positioned at each end of the beams and along a block strip onto the substructure wall, as indicated on your design plans․ Standard practice suggests 2 slipbricks per 440mm spacing (for maximum block size) and 1 slipbrick per 215mm spacing (for narrower blocks)․ Use a level to ensure accurate placement of each slipbrick, confirming that they are correctly aligned and firmly seated against the wall․ Any necessary adjustments should be made before proceeding with further installation․ Once the slipbricks are in place, check for stability and alignment․ Ensure that the slipbricks provide adequate support for the beams and prevent any movement or shifting of the floor structure․ Properly installed slipbricks contribute to the overall strength and durability of the block and beam floor, minimizing the risk of future problems and ensuring a long-lasting, robust floor system․
Wet Trades and Finishing Touches
After the structural components are in place, the “wet trades,” involving the application of cementitious materials, begin․ This phase typically starts with applying a sand-cement grout to fill any gaps between the blocks, ensuring a solid, level surface and preventing insect or vermin ingress․ The grout aids in load distribution and minimizes block movement, crucial for a stable floor․ Allow sufficient drying time for the grout to cure completely before proceeding to the next stage․ Once cured, inspect the surface for any imperfections or unevenness․ Minor imperfections can be addressed with additional grout or leveling compound․ For a smoother finish, a self-leveling compound may be applied over the grout, creating a perfectly even surface for the subsequent flooring material․ This step is particularly important if the floor will receive a smooth finish, such as tiles or polished concrete․ If using underfloor heating, ensure its proper installation and testing before applying the final topping․ Accurate installation of the underfloor heating system is paramount to the efficiency and performance of the heating system․ Finally, any necessary perimeter upstands for insulation are installed to prevent thermal bridging at the edges of the floor․ The application of the final flooring material—whether tiles, wood, or carpet—is dependent on the intended use of the space and the overall aesthetic goals of the project․ These finishing touches transform the structural base into a complete and functional floor․
Insulation and Vapor Control
Proper insulation is vital for energy efficiency and thermal comfort within a building․ In block and beam floor construction, insulation is typically installed on top of the completed block and beam structure before the concrete topping or screed is laid․ Common insulation materials include expanded polystyrene (EPS) boards or other suitable high-performance insulation․ The choice of insulation will depend on several factors including the required thermal performance, budget, and environmental considerations․ EPS blocks, offering excellent thermal performance and ease of installation, are becoming increasingly popular as a replacement for traditional concrete infill blocks․ When using EPS blocks, ensure they are properly installed to prevent cold bridging, often achieved by ensuring they overlap the concrete beams or by adding an extra layer of insulation over the blocks․ The installation of a vapor control layer is crucial to prevent moisture migration from the ground into the building structure․ This layer is typically a polyethylene sheet or a specialized membrane placed between the insulation and the concrete topping or screed․ Proper sealing and lapping of the vapor control layer are crucial to maintain its effectiveness․ The exact placement and type of vapor control layer should adhere to manufacturer’s instructions and best practices for moisture management․ Any gaps or inconsistencies in the vapor control layer could lead to moisture problems within the floor construction over time․ Correct installation will ensure a durable and energy efficient floor, preventing potential issues arising from poor moisture management and thermal performance․
Concrete Topping or Screed
Once the insulation and vapor control layer are in place, a concrete topping or screed is poured over the entire floor structure․ This provides a level, smooth surface for the final floor finish and adds structural integrity to the floor assembly․ The thickness of the screed will depend on several factors, including the required load-bearing capacity, the type of final floor finish, and any underfloor heating systems․ It’s essential to follow the manufacturer’s specifications for the mix design and placement of the concrete screed․ Proper compaction is critical to prevent voids and ensure a level surface․ If underfloor heating is integrated, careful consideration must be given to the screed’s thickness and thermal mass to achieve optimal heating performance․ The screed should be allowed to cure properly before any further work is undertaken․ This curing process allows the concrete to gain sufficient strength and prevents cracking․ Maintaining appropriate moisture levels during the curing process is also important․ Before pouring the concrete, ensure that all necessary preparations are completed, including the installation of any necessary perimeter insulation to prevent thermal bridging․ This perimeter insulation helps to reduce heat loss and contributes to better energy efficiency․ The finished screed should be inspected for any defects or imperfections before laying the final flooring․ A properly installed concrete topping ensures a robust, durable, and level base for the final floor covering․
Underfloor Heating Considerations (if applicable)
Integrating underfloor heating into a beam and block floor offers significant comfort and energy efficiency benefits․ However, careful planning and execution are crucial for optimal performance․ The chosen underfloor heating system—either electric or hydronic—must be compatible with the beam and block construction․ System selection impacts screed thickness and insulation requirements․ Electric systems often require thinner screeds, while hydronic systems may necessitate thicker ones to accommodate the piping․ Proper insulation is critical to minimize heat loss and maximize efficiency․ Insulation type and thickness should align with the heating system and building regulations․ The insulation layer must be laid smoothly and evenly to ensure uniform heat distribution across the floor surface․ Before installing the heating elements, verify their correct placement according to the manufacturer’s instructions․ Accurate positioning minimizes uneven heating and potential damage to the system․ A competent installer should execute the installation to guarantee system longevity and performance․ Post-installation checks, including pressure testing (for hydronic systems) and electrical continuity testing (for electric systems), are essential before pouring the screed․ Careful consideration must be given to thermal mass and heat transfer properties of the chosen screed to avoid heat loss and ensure effective heating performance․ Finally, ensuring compliance with building regulations is vital to guarantee the safety and efficiency of the underfloor heating system․
Compliance with Building Regulations
Adhering to UK building regulations is paramount throughout the block and beam floor installation․ Approved Document A (Structure) dictates structural integrity, load-bearing capacity, and resistance to collapse․ Calculations must demonstrate the floor’s ability to withstand anticipated loads, including live loads (furniture, people) and dead loads (the floor’s own weight)․ Compliance with Approved Document E (Resistance to Sound) necessitates adequate sound insulation to meet the required standards for airborne and impact noise․ This often involves careful selection of insulation materials and construction techniques․ Approved Document B (Fire Safety) sets fire resistance requirements, impacting material choices and construction methods․ The chosen materials must have appropriate fire ratings to prevent fire spread and protect building occupants․ Approved Document K (Protection from falling or collision) covers safety aspects like preventing falls through the floor structure․ Appropriate measures are necessary to ensure the structure is safe to use․ Furthermore, Approved Document C (Site preparation) must be carefully considered to ensure proper ground conditions for the floor․ Damp-proof measures, as specified in Approved Document C, are critical to prevent dampness from affecting the floor’s performance and durability․ Regular inspections by a qualified building control officer are often required to verify compliance throughout the installation process․ Failure to comply with building regulations can lead to significant delays, costly modifications, and potential legal issues․ Thorough planning and meticulous execution are vital for a successful project․